Operations Independent of Graph Type
Selecting Nodes and Branches
Manual Arranging
Zoom
Using the Navigation Window
Grouping Nodes
Grouping Branches
Undo and Redo Changes
Other Operations with Graph
Selecting Nodes and Branches
All graph objects on which you wish to perform an operation must first be selected. You select objects by left-clicking the object or left-clicking in its vicinity. In order to select several objects at the same time, hold down the Ctrl key and select all the object of your choice by left-clicking them. Another way in which you can make a multiple selection is by selecting the Selection command on the Toolbar or Graph menu and then left-clicking and dragging to mark the area within which all objects will be selected. If you would like to remove an object from the group of selected objects, hold down the Shift key and select the object you would like to remove by left-clicking it.

Manual Arranging
If you start the Manual command from the Graph menu you will be able to arrange objects manually. You arrange objects by clicking an object then dragging it to the position of your choice. On letting go of the key, the graph will be redrawn with a new object position.
If you would like to move a group of selected nodes after selection while dragging the mouse hold down the Ctrl or Shift key.
Zoom
If you would like to zoom in on a particular part of the graph and in this way view the less of the larger details, you can use the Zoom in and Selective zoom in commands as well as the mouse wheel. By starting the Zoom in command from the Graph menu or the corresponding toolbar button you can enlarge the central graph area or the area around the starting type in accordance with the Originated option in settings.
The other way is to use the Selective zoom in command. First you click the Selective zoom in toolbar button or start the corresponding menu command. Then you mark the are you would like to view by holding down the left mouse button in one corner of the area and then dragging the rectangle and releasing the mouse button. Only the selected part of the window will then appear in the graph.
It is possible to zoom in on a part of the graph using the mouse wheel. Hold down the Ctrl key and turn the mouse key up—you will perform the Zoom In operation.
The Zoom out operation enables you to view several smaller details in the Graph. Zoom out is activated by selecting the Zoom Out command from the menu or the corresponding toolbar button.
You can also perform this command using the mouse wheel. Hold down the Ctrl button and turn the wheel down—you will perform the Zoom Out operation.
Zoom 100% displays the graph with the actual size of the nodes and branches, that is node dimensions correspond to the values set in the Graph Node Options dialog for particular graph types.
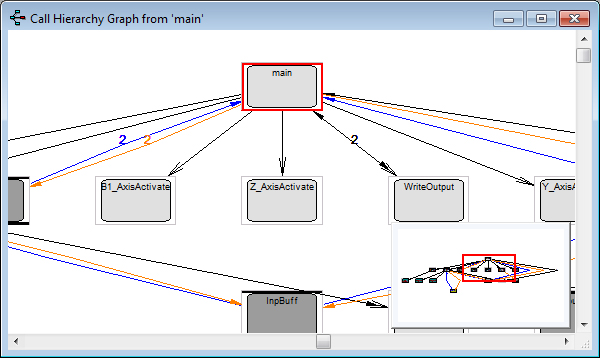
Using the Navigation Window
The Navigation window is a window which displays a sized-down, complete graph and a red-bordered, visible area in the main window. You can open the Navigation window in three ways: by starting the Graph / Navigation Window command, by selecting the corresponding toolbar option or from the shortcut menu which appears when you right-click the empty space in the Graph. When the Navigation window is open, you can left-click the bordered red area and then move it to a part of the graph image of your choice and, on releasing the key, an image of the newly bordered area appears in the main Graph.
Working with the Navigation window
The Navigation window initially appears next to one of the corners of the main Graph, which you can adjust. It is also possible to set the Navigation window to appear immediately on opening the graph. The Navigation window is disabled by closing the Graph, closing the menu command, clicking the toolbar button again or disabling the Navigation Window shortcut menu option which appears when you right-click empty space in the Graph.
The Navigation window can be moved once it has been shown to any part of the DA-C work area. You move it by left-clicking the Navigation window area outside the red rectangle and dragging it to the position of your choice.
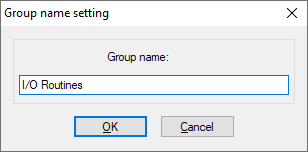
Grouping Nodes
When you want to group a certain number of nodes into a single node, you can use the Group operation. First select the nodes you would like to have in the same group and then activate the Graph / Group menu command.
The Group name settings dialog
Group name
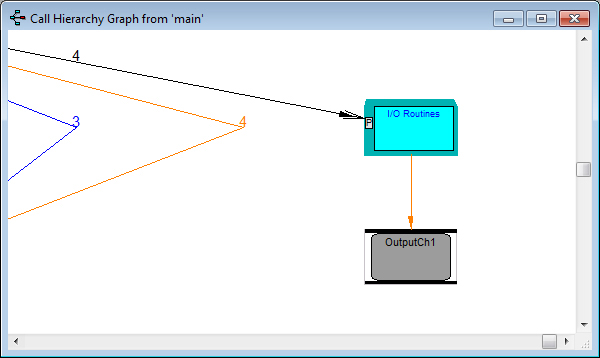
The following figure shows an example of the grouping operation:
The grouping operation

Operations with Branches
If you do not see the complete branch in the Graph, you can use mouse right-click shortcut menu commands View Edge Beginning or View Edge Ending on the graph branch to see its beginning or end.
Grouping Branches
To simplify the graph, you can change the branch display regime so that only one branch is drawn between nodes to represent all the branches in a particular direction. Changing the branch display regime to the compressed branch regime and vice versa can be accomplished by activating the Reduced mode menu command or the toolbar button. You can also specify that the number of branches a compressed branch represents be visible with it, as well as whether Reduced mode is active on opening the graph.
The branch display regime before...
... and after applying Reduced mode command


Undo and Redo Changes
You can undo and redo operations in the graph using the Undo and Redo commands which appear on the Graph menu and Graph toolbar. In Graph Options you can set the depth of the undo operation, that is the number of actions which can be undone.
Other Operations with Graph
When the Zoom in operation has been performed on the graph at least once, the Graph appears with standard scroll bars. The graph enables scrolling using the keyboard, that is arrows, arrows in combination with the Ctrl key, the keys PgDn, Ctrl+PgDn, PgUp, Ctrl+PgUp, Home and End. The graph can also be scrolled using the mouse wheel.
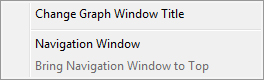
Right-clicking the empty space in the Graph brings up the shortcut menu on the following figure:
Shortcut menu brought up by right-clicking the empty space in the Graph
By selecting the Change Graph Title option, you can change the title of the Graph.
By selecting the File > Save As option when the Graph is active, you can save the graph in WMF file.
By selecting the Edit > Copy option when the Graph is active, you can copy the graph to the Clipboard.
You can print the graph by selecting the File > Print option.